In this final part of this series I add a network connection manager, add a couple of extra functions, add a stand, fix a couple of problems.
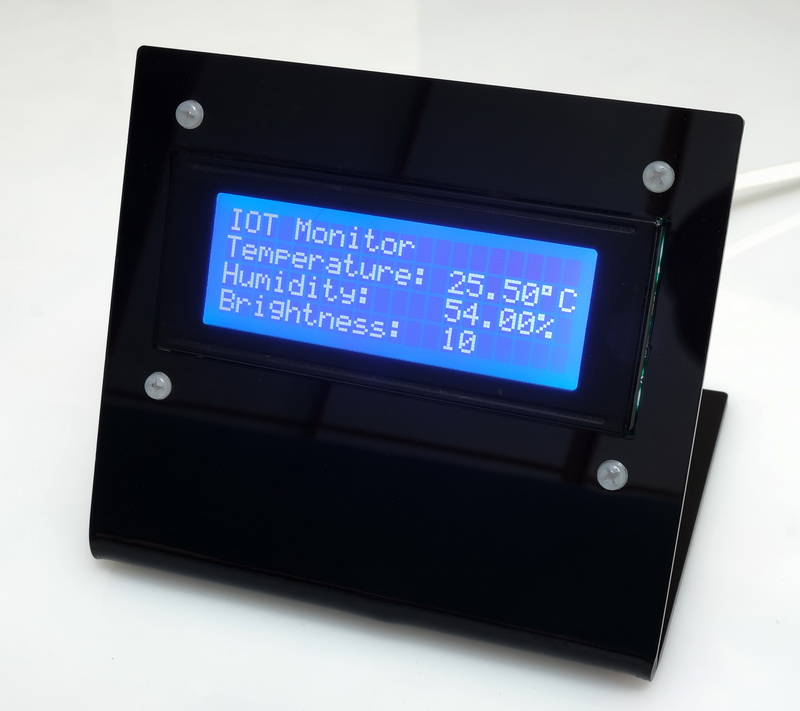
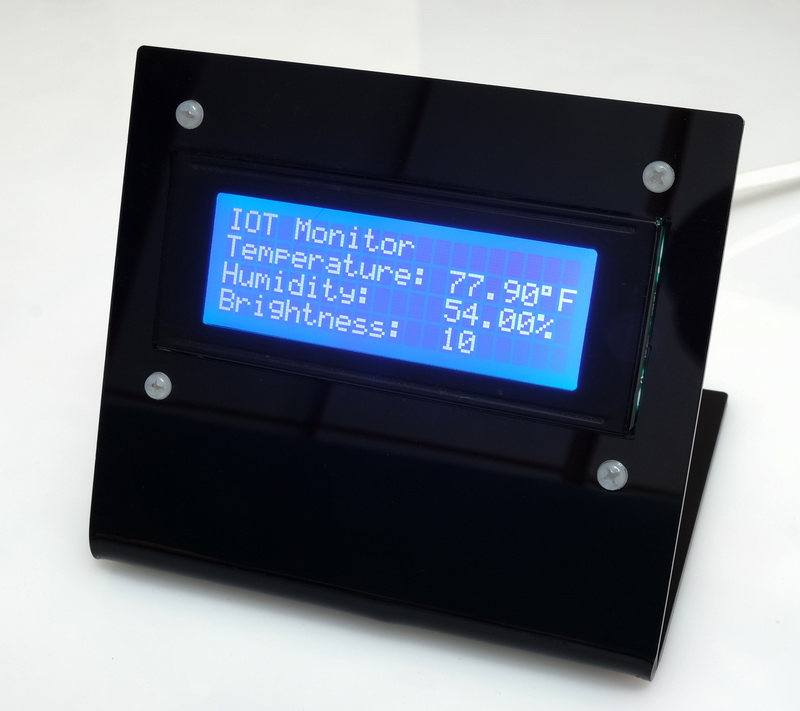
Here is the final project.
Arduino, ESP32/8266, Bluetooth, and stuff
In this final part of this series I add a network connection manager, add a couple of extra functions, add a stand, fix a couple of problems.
Here is the final project.
25.06.2020: Updated the circuit diagrams.
So far I have kept to the plan.
1. Test the sensors with a basic sketch
2. Create a basic website using websockets to show the sensor data.
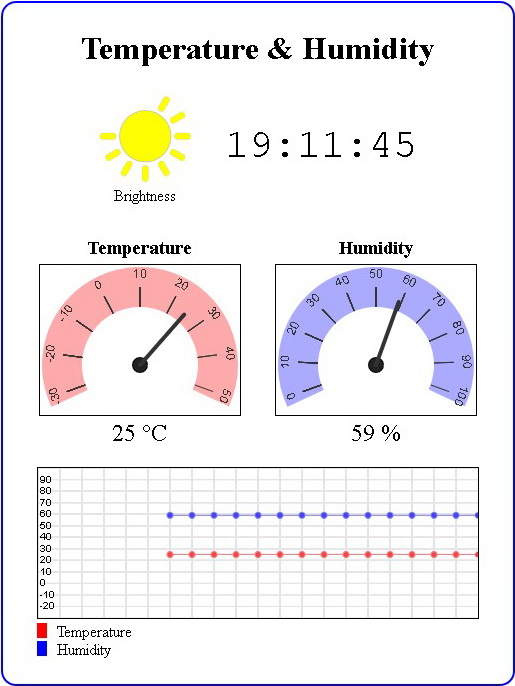
3. Enhance the website, add dials and a graph.
4. Add a LCD
5. Add Wifi Manager.
6. Maybe add time to the LCD version using a NTP server.
7. Put the project in to a stand
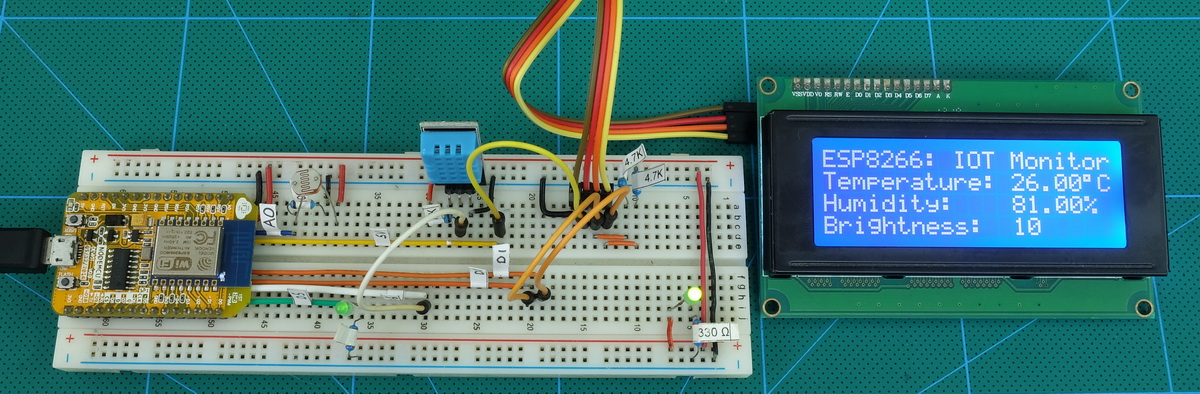
Sections 1 to 3 are complete and in this part I want to add a LCD.
We are now ready to implement the final webpage.
 The hard part is the html and javascript for the widgets. The code for the sketch is pretty much the same as in the previous example.
 In the last post we ended with a working but very basic website. Now it’s time to make the webpage look nicer. Be aware that I am not a graphic artist and use the word nicer very loosely.
It’s been a while since my last post on using the ESP8266 with the Arduino IDE. Life became busy and what free time I had I spent updating the dropController. Eventually guilt got the better of me though.
In previous posts we looked at various different things; using the ESP8266 to serve a webpage, using Wifi Manager to create a connect portal, creating a self updating page, using websockets, and more. Now we finally start putting everything together.
In part 8 we set up a self refreshing webpage that displayed the temperature and humidity from a DHT11. In part 9 we took a first look at websockets. In part 10 we combine the two and add a few embellishments.
Websockets can be fast, very fast, and since the webpage will not be updating very often this is not one of the best examples of websockets, it does continue the gentle introduction started last time though.
For a while now I have been wanting to create IOT/web widgets such as graphs and gauges. I wanted widgets similar to the things Blynk offers but I didn’t want the back end server. I wanted every thing self contained on the ESP8266. This project is the start of that.
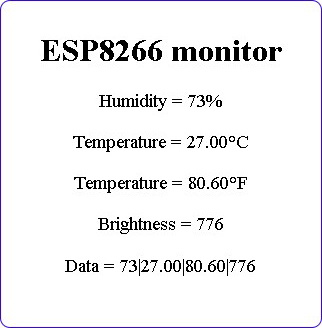
The goal of this guide is to create a environment monitor station that has a LCD display and also a webpage using an ESP8266, a DHT11, a LDR, javascript, and websockets.
As always I will do this is steps so that each part is clear.
In the previous post I looked at how webpages could be made to auto reload and auto update and by using Javascript how specific parts could be updated without the need to load the whole page.
Although the Javascript makes the webpage appear slicker the website still uses the client request method as before (the webpage still had to request new data). The Javascript just made the experience nicer. This post starts to look at true asynchronous or two-way communication where either side can send data without being asked for it. This is achieved by using websockets.
So far I have gone through controlling LEDs from a simple web app where all control is done via buttons in the app. This works well but you need to click a button in the app to make things happen, some kind of user action is required to update the webpage. Here we start to look at getting a webpage to update itself.
 If you have followed the previous posts you will have a working, fairly robust, LED control. If you haven’t gone through the previous posts you can find links just below.
The webpage works well but the whole page reloads to update the button and controlling a single LED is not ground breaking. In this post I address the page reload by adding AJAX/JavaScript and in the next post I will add more controls.
In the previous guides we connected the ESP8266 to a local network using hard coded credentials. It is fine for messing around with examples and when developing sketches but not very convenient or practicle for final projects.
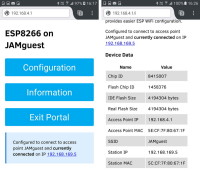
What happens if you want to move the ESP8266 to another network or if you buy a new router? You need to change the sketch and re-upload. It would be better if we could pick the network to use at run time. This is exactly what WifiManager allows.
In the earlier parts we got the ESP8266’s IP address by displaying it in the serial monitor. This is OK for examples and development but not practical for real life projects. There are a few ways to get the IP address, here I look at mDNS. mDNS allows you use to connect to the ESP8266 using a name or url.
This sounds great, and it is unless you are an Android user. More on that later.
Updated: 30.10.2017
The old guide was out of date and had become a little messy and I had been thinking about redoing it for a while. Also, how I use the ESP8266 has changed and since I am using one as part of a IOT Word Clock I am currently building I thought I would update the guide. So, here is the all new version 2.0. The post for the IOT Word Clock will come later, probably much later…
Part 1: The Esp8266 and setting up the Arduino IDE
Part 2: Control an LED from a web page using Access Point Mode (AP)
Part 3: Control an LED from a web page using Access Station Mode (ST)
Part 4: mDNS
Part 5: wifiManager
Part 6: JavaScript and AJAX
Part 7: More Controls. 3 LEDs
Part 8: Auto Updating Webpage
Part 9: First steps with Websockets
Part 10a: IOT Monitor part 1 – webpage
Part 10b: IOT Monitor part 2 – enhancing the webpage
Part 10c: IOT Monitor part 3 – adding a LCD
Part 10d: IOT Monitor part 4 – the final project
In the first part I explained how to set up the IDE and got the basic blink sketch working. Here I go through building a web page control panel to control the LED remotely. I will start with a basic web page and then slowly refine it so we end with a simple but elegant control panel.
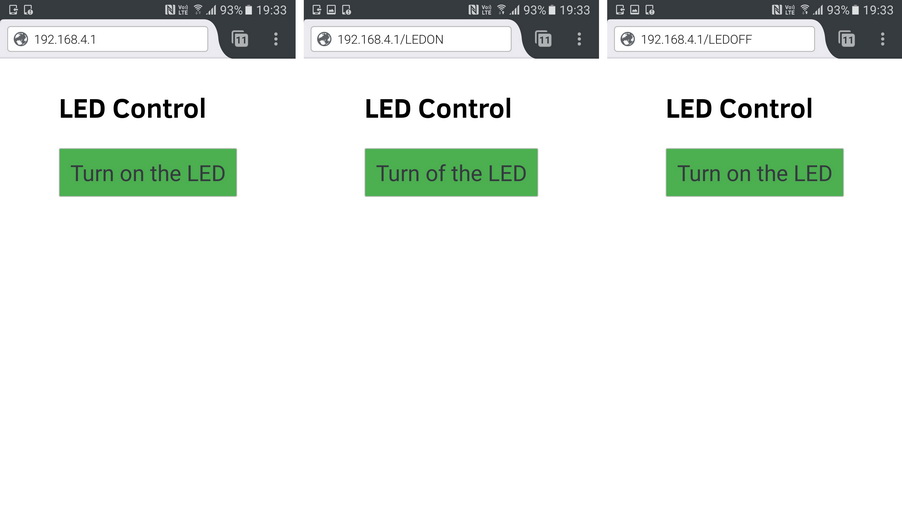
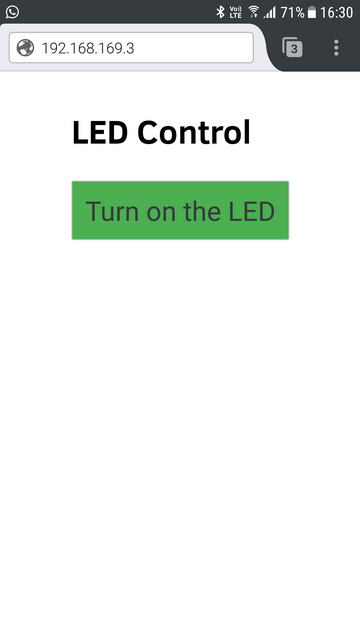
For this example I will be using the ESP8266 as an access point (AP Mode). This means the ESP8266 will create its own little network which we can connect to. The ESP8266 will then serve a small web page which we can view on a mobile device or any web enabled device such as a laptop.
I still have the LED connected to pin D1 but now I want to turn it on and off from a web page viewed on a mobile device. The web page will need 2 buttons, one for on and one for off. It would be nice if it also showed the current LED status. Something like “LED is on” and “LED is off”. Since this is a first example of a web control the actual web page should be as simply as possible.
I won’t go in to detail about creating web pages, if you are new to this there are many other sites to help you.
In the previous part we used the ESP8266 in Access Point mode where the ESP8266 generated it’s own mini network. Here we get the ESP8266 to connect to an existing wifi network. To do this we use the ESP8266 in Station Mode (STA). Switching to Station Mode is done by the library automatically so we do not need to mess around.
When using the ESP8266 in Station Mode, the connecting device has to be connected to the same network as the ESP8266. In AP mode, since the ESP8266 creates its own network, other local networks don’t matter.
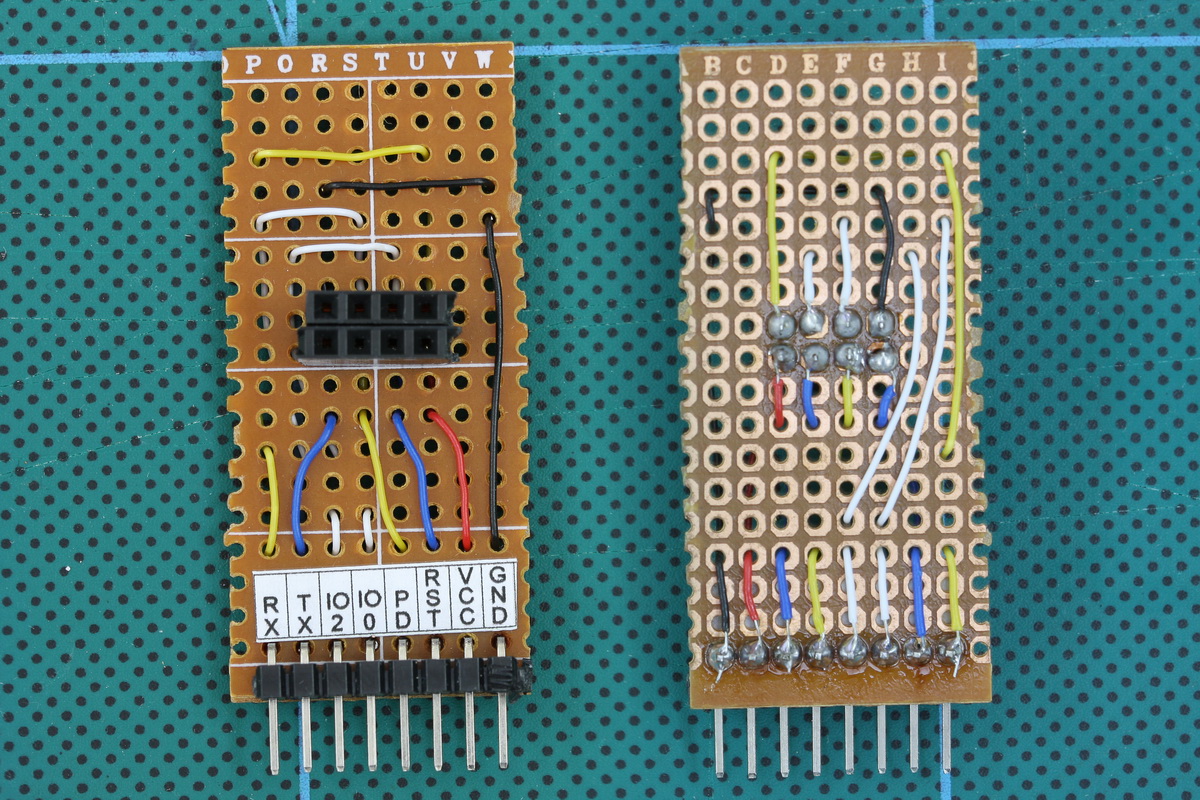
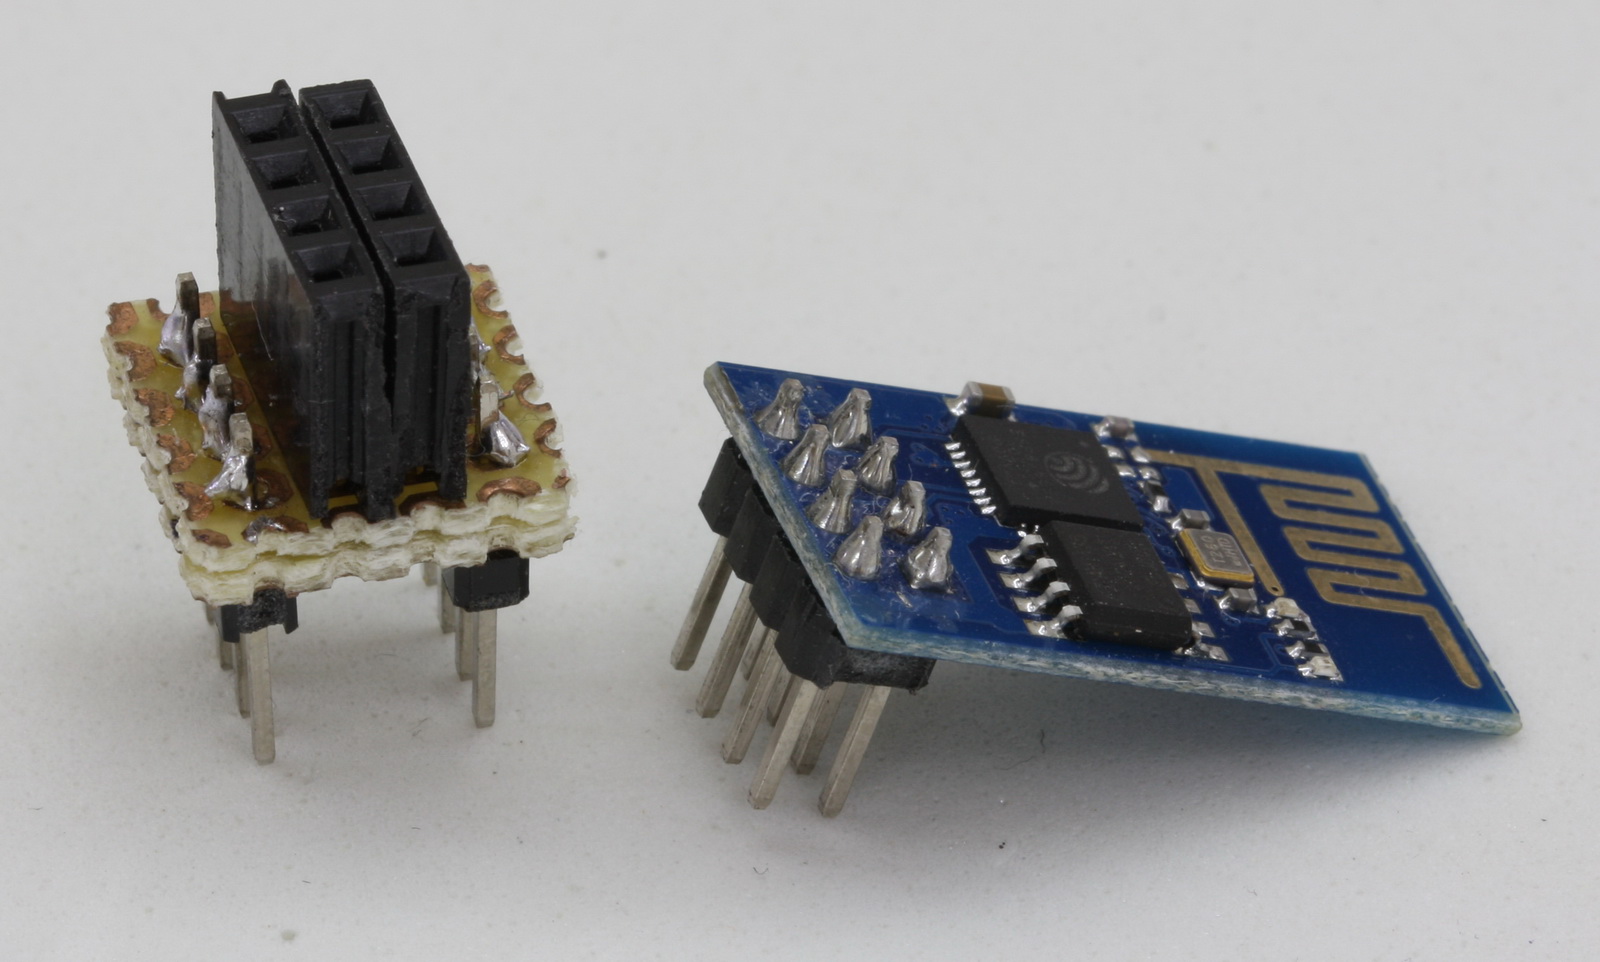
Here is my 5V ESP8266-01 programming breakout board.
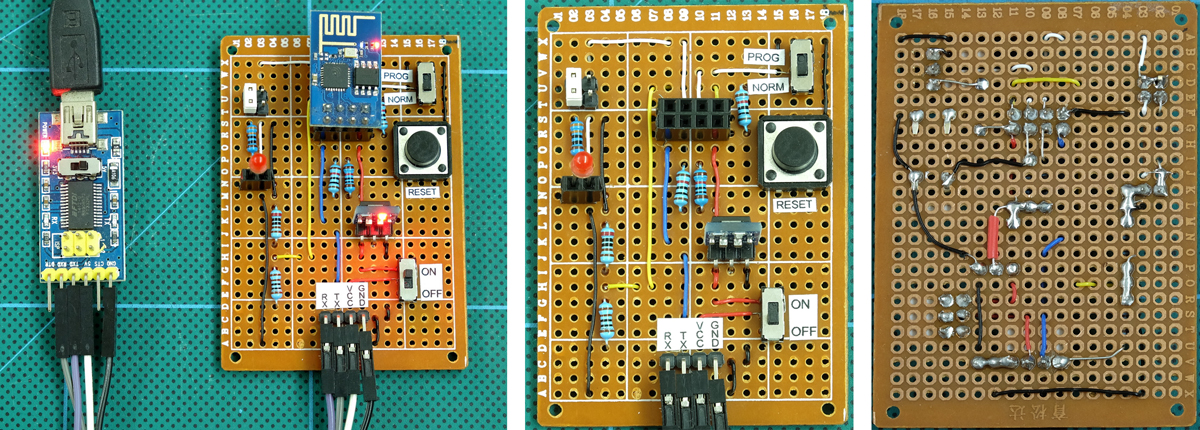
I am now programming the ESP8266’s via the Arduino IDE and I found using bread boards and wires was annoying, especially because I have a habit of VCC and GND mix up. I have a small pile of dead ESP8266-01s, dead due to shorting them while moving wires around. They are next to the pile of Arduino Nanos I have killed for the same reason.
Since starting to use the ESP8266’s again I have made a couple of breadboard friendly breakout boards. Version 1 worked but moving wires was inconvenient (the ESP8266 was in the way). Version 2 was better but I still had to mess with power, resistors and lots of wires. This lead me to version 3. A fully self contained programming breakout board.
I have been playing with the ESP8266 modules again and had made a small adaptor to enable me to use the ESP8266 on a breadboard. It soon became apparent the adaptor was not the best design as it blocked access to some of the rear connections. This lead me to version 2.
Update: 2017-01-15
Although the below adaptor works I found it inconvenient. The rear connectors are blocked by the ESP8288. I therefore built a ESP8266 bread board adaptor version 2
After a lengthy pause I have started playing with the ESP8266 modules again and I was getting annoyed by all the wires when using them on a bread board. So, like others before me, I built a small bread board adapter.
Update:
This is a very old guide and things have moved on a lot since this was written. One of the main advances is the ESP8266 core for the Arduino IDE. This means the ESP8266 can now be programmed like an Arduino and this is how I use them now, no more messing around with AT commands. For a general overview and examples of using the ESP8266 with the Arduino core see ESP8266 and the Arduino IDE.
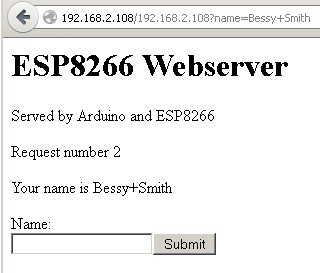
Here is my first attempt at a web server using the ESP8266. It includes a request count and also a text input field.
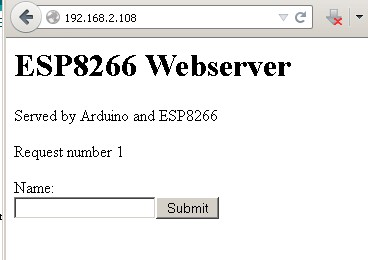
Enter your name and hit submit
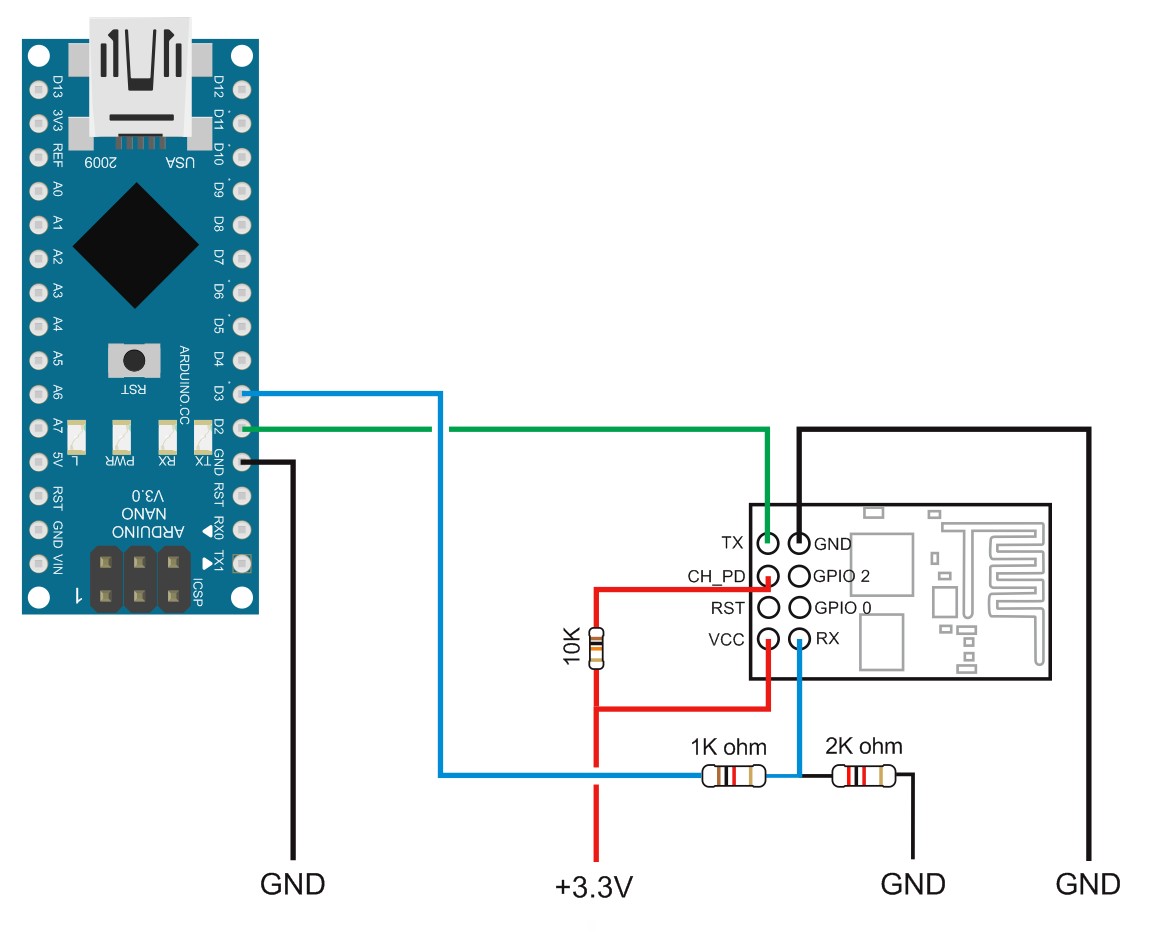
Following on from the FTDI + ESP8266 post, if you do not have a FTDI serial adaptor you can use an Arduino. Here is how to set up the Arduino to talk to the ESP8266.
Just started to play with the ESP8266-01 modules. Purchased from Taobao.
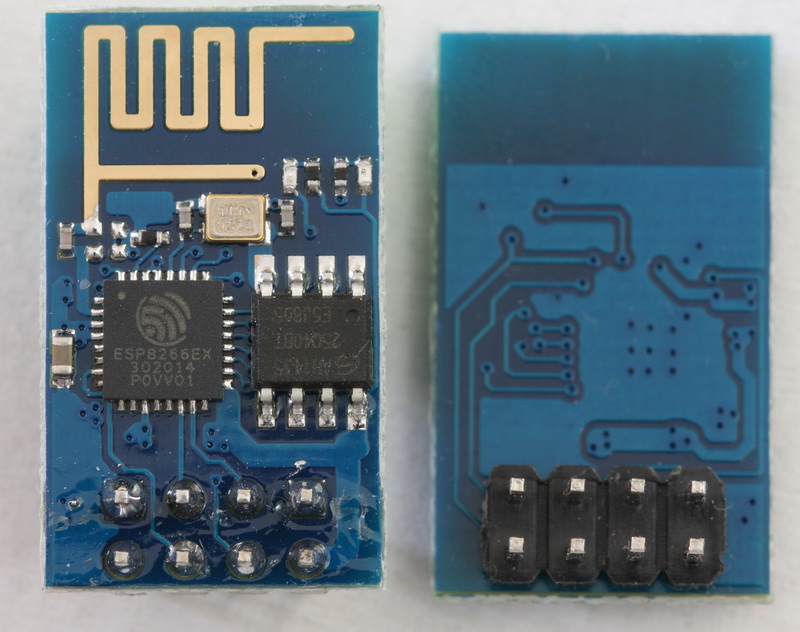
These, I believe, are version 2 and have the LEDs near the antenna. When first started they identify themselves as [Vendor:www.ai-thinker.com Version:0.9.2.4] and are version 018000902-AI03. This is a custom firmware from ai-thinker.
There seems to be quite a few different versions of similar modules. And the same module could have one of several firmwares.