As you may have noticed from some of the other posts, I use App Inventor 2 to create Android apps. I do not have time to learn JAVA programming and I found App Inventor an easy way to get in to the world of Android apps. AI2 is not perfect. It is designed as a teaching aid rather than a fully featured Android programming language and as such there are many things missing. However, you can create some surprisingly advanced apps with it. The Arduino Bluetooth Control and the dropController apps were created in AI2 as is the new Bluetooth Control Panel app.
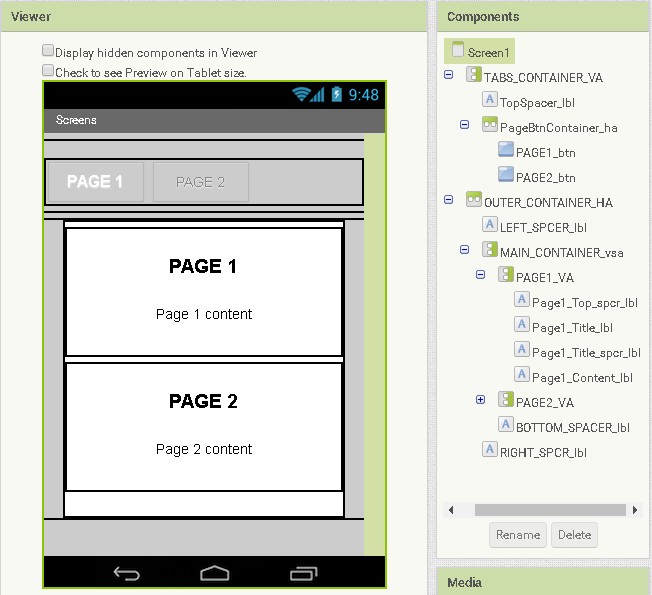
Using AI2 it is fairly simple to create apps that have multiple screens but this has a drawback. AI2 cannot share a Bluetooth connection across different screens. This means we need a work-a-round. My way is to use pseudo screens. These look and act as regular screens but are in fact containers within a single screen. I generally use vertical arrangements as content containers but other types of element can be used.
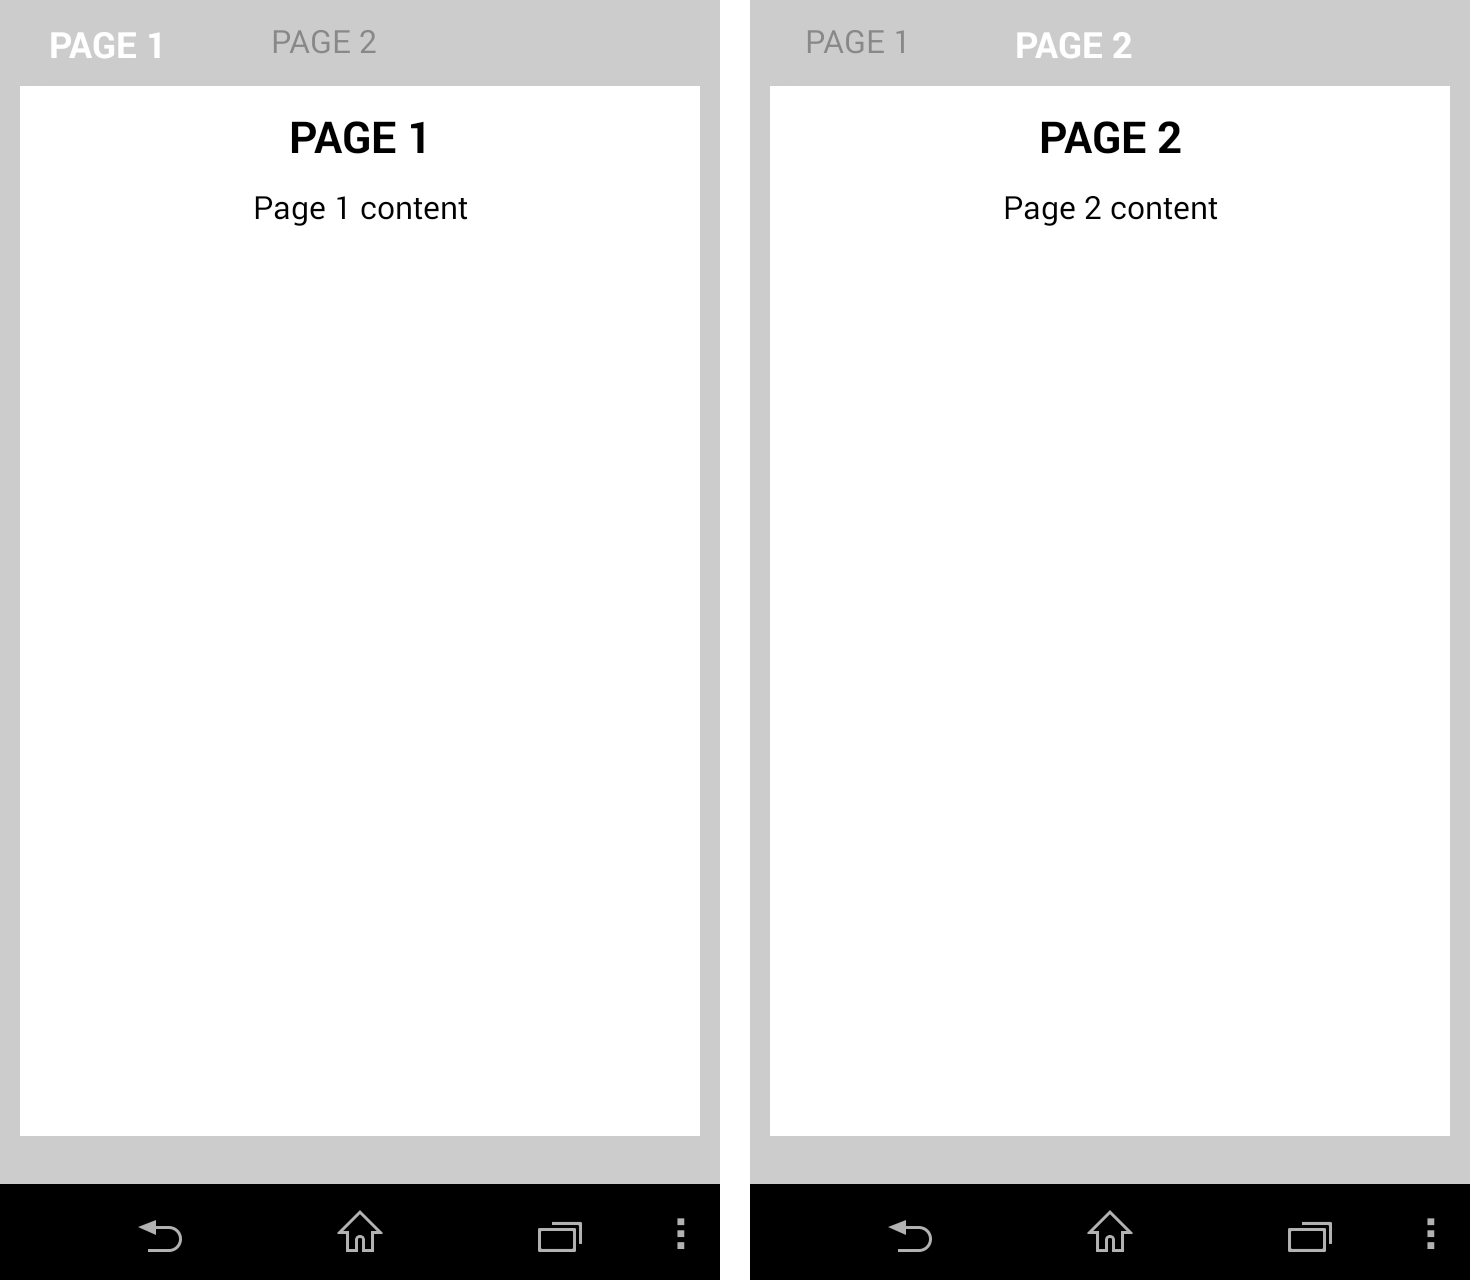
The effect is that it should look like normal app screens. Tap the PAGE 1 button and page one is displayed. Tap the PAGE 2 button and page 2 is displayed.
Each screen is inside its own container, PAGE1_VA and PAGE2_VA, which gets turned on and off as the user clicks the page buttons.
The blocks for this are fairly simple.
To make like a little easier while using AI2 I leave some of the Designer View settings at their default settings and also have the content containers at a size that fits in the view. I then change the settings in the blocks. This means I do not need to remember to keep changing them before running the app or building the apk.
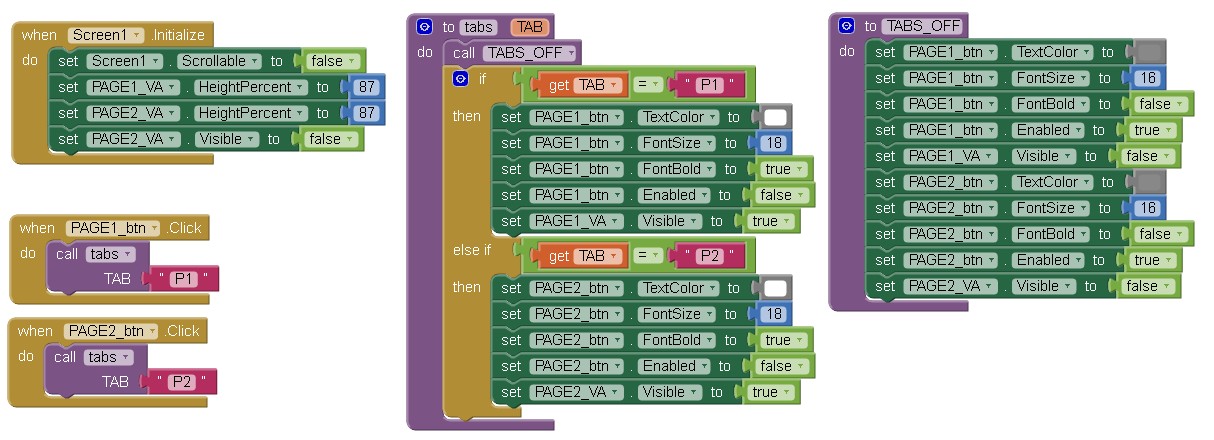
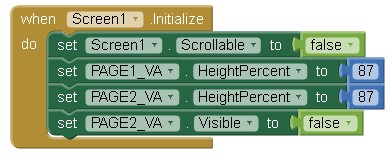
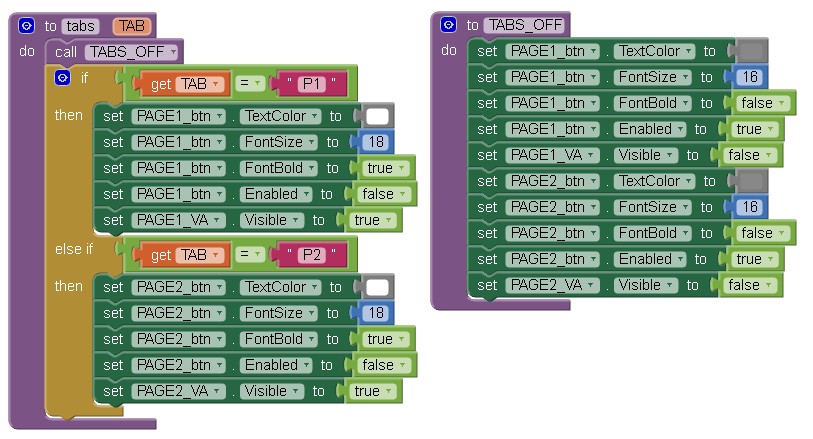
I change the settings in the Screen1.Initialize block which is always the first block to be executed when the app starts. Here I change the screen to non scroll and resize the PAGE1_VA and PAGE2_VA containers. I then turn off PAGE2_VA.
After the app is initialized it waits for the user to click the page buttons. It should be noted that the button for the current page is not enabled. This means when on Page 1 only the Page 2 button can be clicked and vice versa.
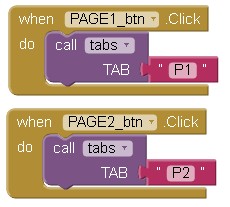
When a button is clicked the button clicked function passes the page value to the tabs function. The tabs function first calls the TABS_OFF function which turns all the tabs and conent containers off, and then it turns on the tab and content for the current page. Turning everything off may seem wasteful but it keeps the logic simple and makes the tab system easy to scale. Adding a third and forth page is very straight forward.
In this example I have kept the visual side simple. The button for the active page has a slightly larger text size and the text is white. Of course you can add what ever graphics you like.
![]()
Download
Excellent and super helpful, as usual!