Updated: 30.10.2017
The old guide was out of date and had become a little messy and I had been thinking about redoing it for a while. Also, how I use the ESP8266 has changed and since I am using one as part of a IOT Word Clock I am currently building I thought I would update the guide. So, here is the all new version 2.0. The post for the IOT Word Clock will come later, probably much later…
Part 1: The Esp8266 and setting up the Arduino IDE
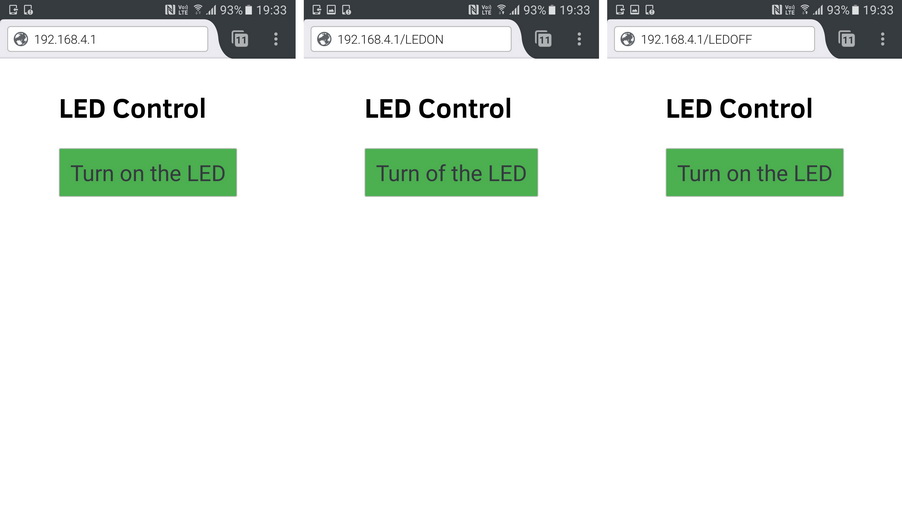
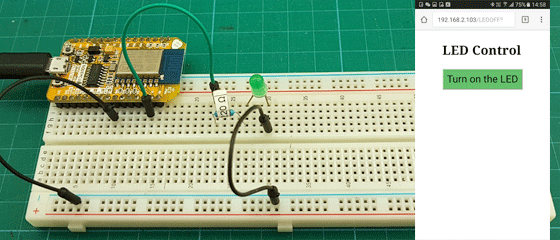
Part 2: Control an LED from a web page using Access Point Mode (AP)
Part 3: Control an LED from a web page using Access Station Mode (ST)
Part 4: mDNS
Part 5: wifiManager
Part 6: JavaScript and AJAX
Part 7: More Controls. 3 LEDs
Part 8: Auto Updating Webpage
Part 9: First steps with Websockets
Part 10a: IOT Monitor part 1 – webpage
Part 10b: IOT Monitor part 2 – enhancing the webpage
Part 10c: IOT Monitor part 3 – adding a LCD
Part 10d: IOT Monitor part 4 – the final project