This post continues the Arduino, HM-10 and App Inventor 2 guide. A few people asked about adding a slider so here it is. Please beware; this is not a basic guide for using a slider in App Inventor 2. I am adding a slider to an existing app and have certain things (semi advanced) that I want to achieve.
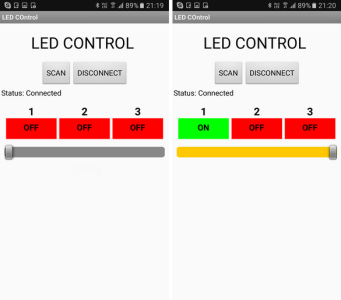
In the previous guide we created a basic Android app to control 3 LEDs. The app was developed in such a way to make adapting it as easy as possible. So let’s see if that is true and add a slider to control the brightness of one of the LEDs. We start with extending the app and then update the Arduino sketch.
Using the same command method as before, we will create an ascii command and send it to the Arduino. The command will be in the form “[Snnn]”. Where S is used to denote slider and nnn is a value from 0 to 255, or more specifically “000” to “255”. The Arduino will read the command and set the LED brightness accordingly. Using ascii for this keeps things fairly simply but it is not the fastest way to do it. The slider value will be from 0 to 255, this is actually the same value range as an 8bit byte. Using the ascii command we need 6 characters (including the square brackets). To send the actual value only would require 1 character (2 with a label/marker character). If all you are using is a single slider then there is no reason to use ascii.