AKA: Time How Long A Push Button Switch Is Closed.
Ever wanted to know how long a button switch was pressed for? YES. Read on.
A couple of examples that do exactly the same thing, time how long a button switch was closed/pressed, but in slightly different ways.
- When the button is pressed (switch is closed) – Start a timer. Show “”Pressed” in the serial monitor.
- When the button is released (switch is opened) – Stop the timer. Display the total time pressed in the serial monitor.
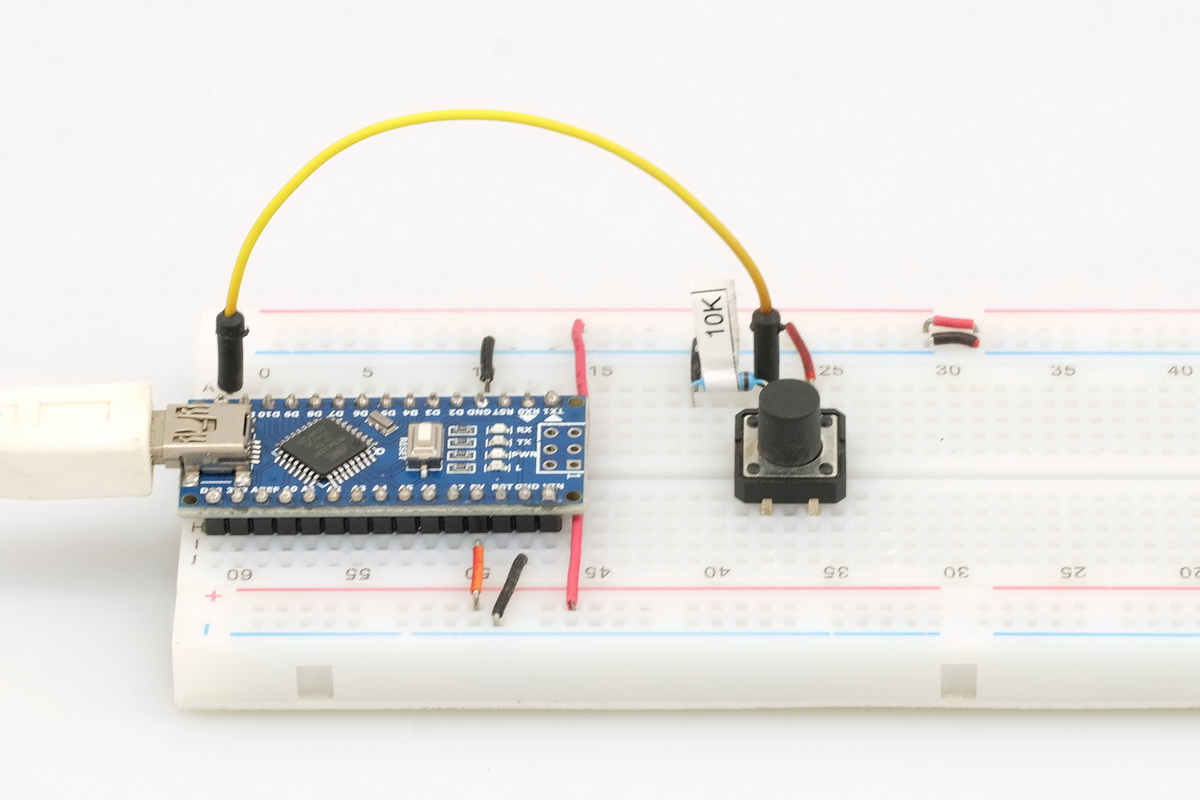
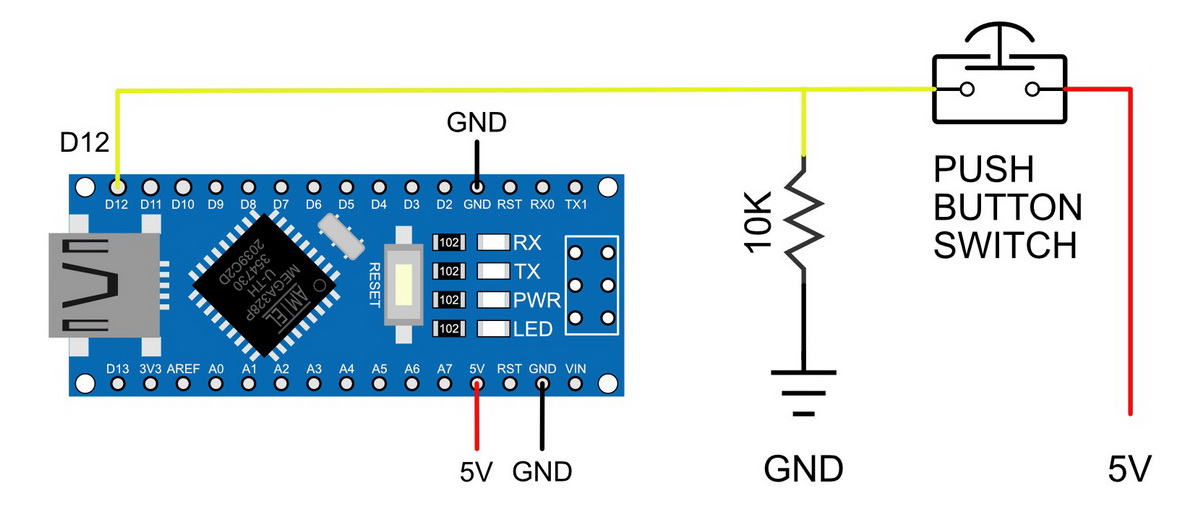
Circuit
Both examples below use the same, very simple circuit. An Arduino with a button switch connected to pin D12. The switch has a 10k pull down resistor.
Example 1
The first example is fairly straight forward with everything happening in the main loop().
What we doing?
Read the button switch pin.
Update the switchStatus variables.
If the switch has gone from OPEN to CLOSED start the timer.
If the switch has gone from CLOSED to OPEN stop the timer. Print the time.
Start again.
Example 1 Sketch
//  Sketch: Arduino - push button switch - time pressed 001
//  Show the time a button switch has been pressed
//  www.martyncurrey.com


//  Pins
//  D12 to push button switch with 10K ohm pull down resistor
const int PIN_PUSH_BUTTON_SWITCH = 12;

// variables

// switch status. Current and previous
boolean oldSwitchState = LOW;

// extra variables used for debounce
boolean newSwitchState1 = LOW;
boolean newSwitchState2 = LOW;
boolean newSwitchState3 = LOW;

// timer to record how long the switch is closed
long timer_timeStart = 0;
long timer_timeStop  = 0;

void setup()
{
    Serial.begin(9600);
    Serial.print("Sketch:   ");   Serial.println(__FILE__);
    Serial.print("Uploaded: ");   Serial.println(__DATE__);
    Serial.println(" ");

    pinMode(PIN_PUSH_BUTTON_SWITCH, INPUT);
}

void loop()
{
    // simple debounce
    newSwitchState1 = digitalRead(PIN_PUSH_BUTTON_SWITCH);      delay(1);
    newSwitchState2 = digitalRead(PIN_PUSH_BUTTON_SWITCH);      delay(1);
    newSwitchState3 = digitalRead(PIN_PUSH_BUTTON_SWITCH);

    // if all are the same value then we have a reliable reading
   if (  (newSwitchState1==newSwitchState2) && (newSwitchState1==newSwitchState3) )
   {
        // check to see if the switch state has changed.
        // This can be OPEN to CLOSED or CLOSED to OPEN.
        if (newSwitchState1 != oldSwitchState)
        {

            //  OPEN to CLOSED
            if ( oldSwitchState == LOW && newSwitchState1 == HIGH )
            {
                // the switch has just been closed / button has been pressed.
                // start the timer
                timer_timeStart = millis();
                Serial.print("Key pressed.  ");
            }


            //  CLOSED toOPEN
            if ( oldSwitchState == HIGH && newSwitchState1== LOW )
            {
                // switch is OPEN and was CLOSED last time.
                // stop timer and print the time the button was pressed
                timer_timeStop = millis();
                Serial.print("Key was pressed for ");
                Serial.print(timer_timeStop - timer_timeStart );
                Serial.println(" ms");
            }

            oldSwitchState = newSwitchState1;

        } //  if (switchState != oldSwitchState)

  } // if (  (newSwitchState1==newSwitchState2) && (newSwitchState1==newSwitchState3) )

}  // loop
Hopefully the sketch is fairly self explanatory, especially if you have seen any of the other guides.
When the switch goes from LOW to HIGH (OPEN to CLOSED) a timer is started.
When the switch goes from HIGH to LOW (CLOSED to OPEN) the timer is stopped and the elapsed time is printed in the serial monitor
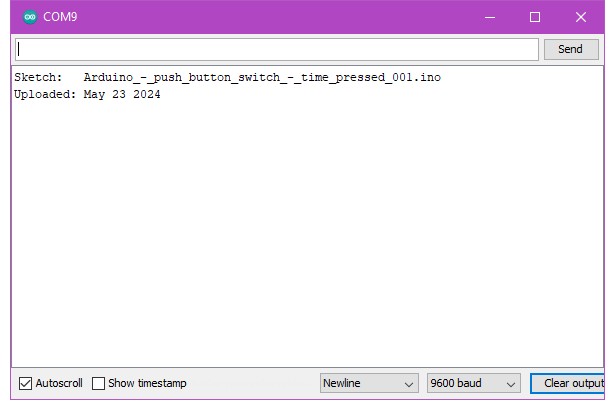
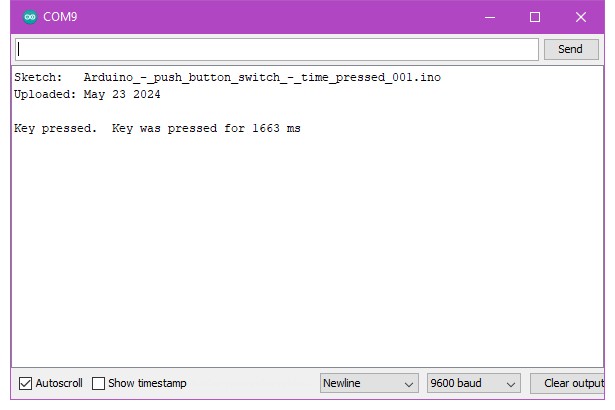
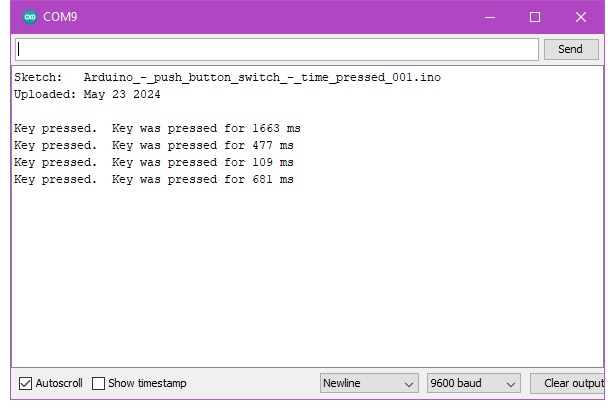
Upload the sketch and open the serial monitor.
Press and hold down the button switch. “Key pressed” is displayed.
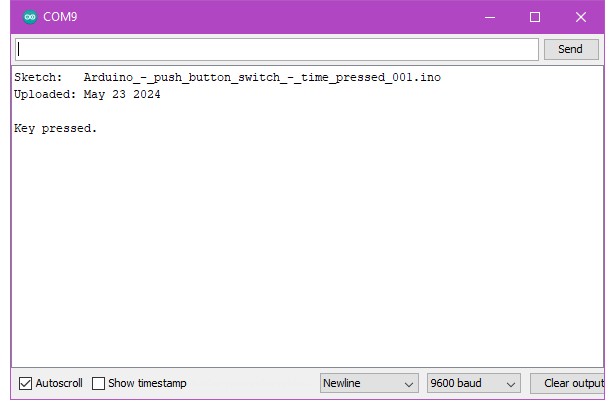
Release the button switch. The total time the button was pressed is displayed.
Next, let’s tidy up the code; move some of the code to functions and make the main loop() cleaner.
For a sketch this short using separate functions isn’t really required, however, as sketches gets longer and longer things can quickly become messy.
Breaking the sketch in to smaller functions makes larger sketches easier to manage and should make the code easier to read.
Example 2
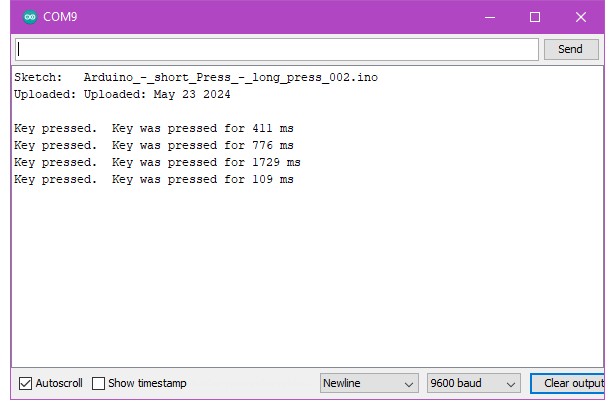
This example does exactly the same thing as the previous one. All we are doing is moving the code around and adding some extra status variables to make the sketch easier to read and appear a little tidier.
Example 2 Sketch
//  Sketch: Arduino - push button switch - time pressed 002
//  Show the time a button switch has been pressed with added functions
//  www.martyncurrey.com


//  Pins
//  D12 to push button switch with 10K ohm pull down resistor
const int PIN_PUSH_BUTTON_SWITCH = 12;

// variables
boolean switchState = LOW;
boolean oldSwitchState = LOW;

long timer_timeStart = 0;
long timer_timeStop  = 0;

byte state = 0;

// These are not really required but using names rather than values makes the code easier to read.
const byte CLOSEDtoOPEN = 1;
const byte OPENtoCLOSED = 2;


void setup()
{
    Serial.begin(9600);
    Serial.print("Sketch:   ");   Serial.println(__FILE__);
    Serial.print("Uploaded: ");   Serial.println(__DATE__);
    Serial.println(" ");

    pinMode(PIN_PUSH_BUTTON_SWITCH, INPUT);
}


void loop()
{
    state = checkSwitch();
    if (state == OPENtoCLOSED) { startTimer(); }
    if (state == CLOSEDtoOPEN) { stopTimer();  }
}  // loop


int checkSwitch()
{
    byte returnVal = 0;
    // simple debounce
    boolean newSwitchState1 = digitalRead(PIN_PUSH_BUTTON_SWITCH);      delay(1);
    boolean newSwitchState2 = digitalRead(PIN_PUSH_BUTTON_SWITCH);      delay(1);
    boolean newSwitchState3 = digitalRead(PIN_PUSH_BUTTON_SWITCH);

    if (  (newSwitchState1==newSwitchState2) && (newSwitchState1==newSwitchState3) )
    {

       if (newSwitchState1 != oldSwitchState)
       {
            //  OPEN => CLOSED
            if ( oldSwitchState == LOW && newSwitchState1 == HIGH )
            {
              returnVal = OPENtoCLOSED;
            }

            //  CLOSED => OPEN
            if ( oldSwitchState == HIGH && newSwitchState1== LOW )
            {
              returnVal = CLOSEDtoOPEN;
            }

            oldSwitchState = newSwitchState1;
       }

    } // if (  (newSwitchState1==newSwitchState2) && (newSwitchState1==newSwitchState3) )

    return returnVal;
} // int checkSwitch()


void startTimer()
{
    // start the timer
    timer_timeStart = millis();
    Serial.print("Key pressed.  ");
}


void stopTimer()
{
    // stop the timer and print the total time the button was pressed
    timer_timeStop = millis();
    Serial.print("Key was pressed for ");
    Serial.print(timer_timeStop - timer_timeStart );
    Serial.println(" ms");
}
Changes
- Moved the switch check code to its own function.
- Created functions to start and stop the timer.
The main loop() is now quite compact and, hopefully, easy to see what is happening.
void loop()
{
    state = checkSwitch();
    if (state == OPENtoCLOSED) { startTimer(); }
    if (state == CLOSEDtoOPEN) { stopTimer();  }
}  // loop
The code that checks the switch is now in its own function. The functions returns an integer used to record the switch status.
int checkSwitch()
{
    byte returnVal = 0;
    // simple debounce
    boolean newSwitchState1 = digitalRead(PIN_PUSH_BUTTON_SWITCH);      delay(1);
    boolean newSwitchState2 = digitalRead(PIN_PUSH_BUTTON_SWITCH);      delay(1);
    boolean newSwitchState3 = digitalRead(PIN_PUSH_BUTTON_SWITCH);

    if (  (newSwitchState1==newSwitchState2) && (newSwitchState1==newSwitchState3) )
    {

       if (newSwitchState1 != oldSwitchState)
       {
            //  OPEN => CLOSED
            if ( oldSwitchState == LOW && newSwitchState1 == HIGH )
            {
              returnVal = OPENtoCLOSED;
            }

            //  CLOSED => OPEN
            if ( oldSwitchState == HIGH && newSwitchState1== LOW )
            {
              returnVal = CLOSEDtoOPEN;
            }

            oldSwitchState = newSwitchState1;
       }

    } // if (  (newSwitchState1==newSwitchState2) && (newSwitchState1==newSwitchState3) )

    return returnVal;
} // int checkSwitch()
Added 2 new switch change status variables. These are not really required but I thought I’d give an example of using named values to show the status of something. Makes the code easier to read.
const byte CLOSEDtoOPEN = 1;
const byte OPENtoCLOSED = 2;
The new switch change status variables are used when checking if the switch status has changed.
    if (state == OPENtoCLOSED) { startTimer(); }
    if (state == OPENtoCLOSED) { stopTimer(); }
It should be fairly obvious what state == OPENtoCLOSED and state == OPENtoCLOSED means. If it isn’t you could try changing them to wasOPENandIsNowCLOSED and wasCLOSEDandIsNowOPEN.
We now have two short functions to start the timer and to stop the timer.
void startTimer()
{
    // start the timer
    timer_timeStart = millis();
    Serial.print("Key pressed.  ");
}

void stopTimer()
{
    // stop the timer and print the total time the button was pressed
    timer_timeStop = millis();
    Serial.print("Key was pressed for ");
    Serial.print(timer_timeStop - timer_timeStart );
    Serial.println(" ms");
}
Upload the new sketch and give it a go. Be amazed! It does exactly the same thing as before! We have made the loop() function smaller, yeah, and the sketch longer, woah! Sometimes, readability takes more words.
That be all for now.